Creating the Model
Standard Template
By using the same model format of blocks and items, creating a new backpack is as simple as it gets. However to ensure new backpack models are going to work correctly with Backpacked, models begin by using the 📦Standard Template. This file is to be opened with Blockbench.
After loading the template, create a new copy by navigating to File > Save Project As and set the file name to the name of your backpack. This will help avoid overriding the original template if you plan to create multiple backpacks.

What's Inside and Important Notes
In this template, you will find a very basic backpack model and a model of the player wearing the backpack. The backpack model is split into two different Groups in the Outliner, Backpack and Straps. The Straps are separate from the Backpack as they are culled in-game when a the player has a chestplate equipped. A simple retexture of the Straps is generally the best option, and the main design of your backpack should go into Backpack. Only elements that are contained within these two groups will be exported, everything else will be ignored.
The player model, as contained within the Player Model group, gives you a reference as to how the backpack will appear on the player in-game. It is important that you do not move the player model and simply design your backpack around it, otherwise your backpack will not appear correctly once added to the game. The player model will be ignored during export.
Do not change the direction/global rotation of the model. The backpack must be facing South and the player model should be looking North in Blockbench.
Model Directory
Backpacked requires the exported models to placed into a specific directory of your resources, otherwise they won't be picked up by the model loader. Before continuing, create the following directory within yours assets: assets/<namespace>/models/backpacked/.
If the namespace for your resource pack/mod is more_backpacks, the directory would be assets/more_backpacks/models/backpacked/. Any exported models would have the path of assets/more_backpacks/models/backpacked/example.json.
Exporting
Exporting a backpack model is a bit different since you have to export the Backpack and Straps separately.
Method 1: Collections
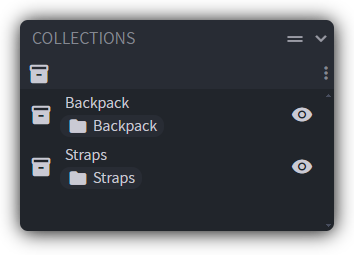
As of Blockbench 4.12, a new feature called Collections was introduced. Collections allow for additional organization of your project as it doesn't depend on the heirachy of groups and elements in the outliner. You can also export a collection, which means it only exports elements in that collection.
Steps
-
Open the Collections panel. Navigate in the menu bar to
View > Panels > Collections > Move To > Right Sidebar. -
You will notice that two collections already exist in the template,
BackpackandStrapsand they contain their respective groups from the outliner. -
Right click on the
Backpackcollection and navigate toExport > Export Block/Item Model. The name of your exported file must be the same as the name when you registered the backpack, e.g.<your_backpack_name>.json. Make sure the model is exported into the model directory. -
Right click on the
Strapscollection and navigate toExport > Export Block/Item Model. The name of your exported file must be the same as the name when you registered the backpack with_straps.jsonappended to the end, e.g.<your_backpack_name>_straps.json. Make sure the model is exported into the model directory.
Although this may be obvious, make sure to remove the arrow brackets when filling in <your_backpack_name>. For example, if the ID of your backpack is panda, then the names of your models are panda.json and panda_straps.json.
Method 2: Group Exporter Plugin
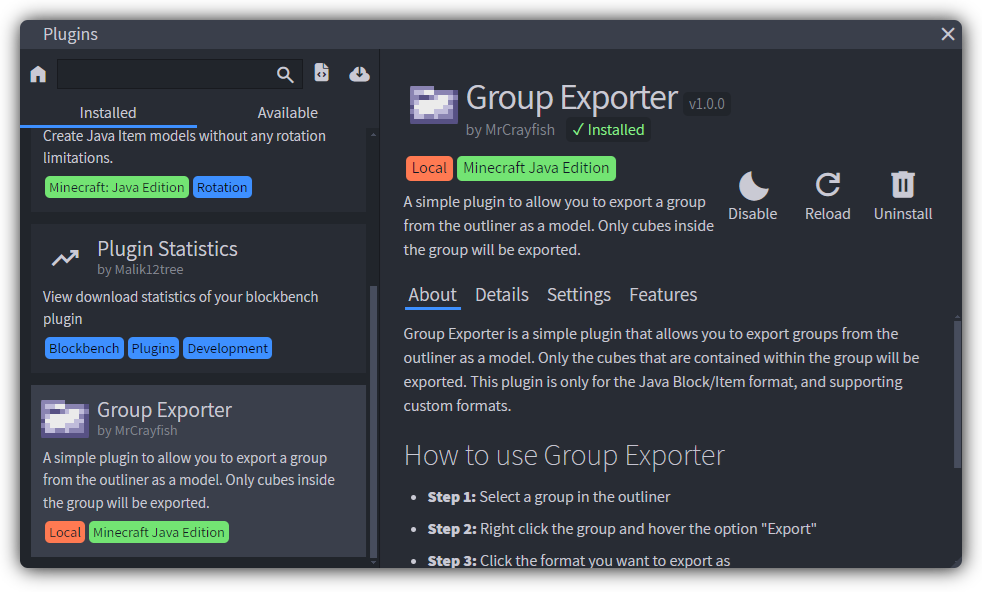
Group Exporter is a plugin for Blockbench. It was created before Collections existed. It behaves essentially the same, except you just right click on a Group in the Outliner and a new Export option will appear at the bottom of the context menu. It will only export elements contained in the group.
To install Group Exporter, simply navigate to File > Plugins, then click the Available tab. Search and install the plugin Group Exporter by MrCrayfish.
Steps
-
Right click on the
Backpackgroup and navigate toExport > Export Block/Item Model. The name of your exported file must be the same as the name when you registered the backpack, e.g.<your_backpack_name>.json. Make sure the model is exported into the model directory. -
Right click on the
Strapsgroup and navigate toExport > Export Block/Item Model. The name of your exported file must be the same as the name when you registered the backpack with_straps.jsonappended to the end, e.g.<your_backpack_name>_straps.json. Make sure the model is exported into the model directory.
Although this may be obvious, make sure to remove the arrow brackets when filling in <your_backpack_name>. For example, if the ID of your backpack is panda, then the names of your models are panda.json and panda_straps.json.
Before You Continue
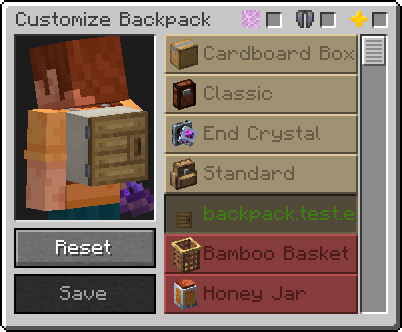
At this point, it is a good idea to test your addon. If you have registered your backpack and designed and exported your model, you should now see your backpack in the list of available cosmetic looks. It should be unnamed and unlocked immediately. If you don't see your backpack or have a missing model, ensure your data and resources are being applied.
If you are using the Base Resource & Data Pack, make sure the resource pack is applied in the resource pack settings menu. The datapack should be installed in the
datapacksfolder contained within your world directory. You will need to/reloador restart your world for the changes to apply.If you are developing or integrating into an existing mod, you just need to launch or restart the game and the data/resources will be updated.
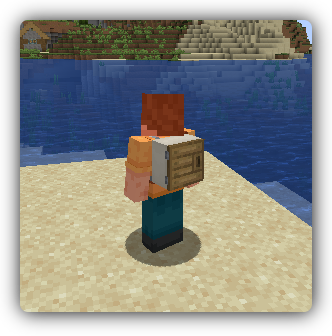
If you've followed the guide correctly so far, you should now see your backpack model loading in-game.
Next Step
It's time to update the display properties of the backpack model in the GUI and the position on the shelf using model metadata!